DIN Abrasion Tester TF215
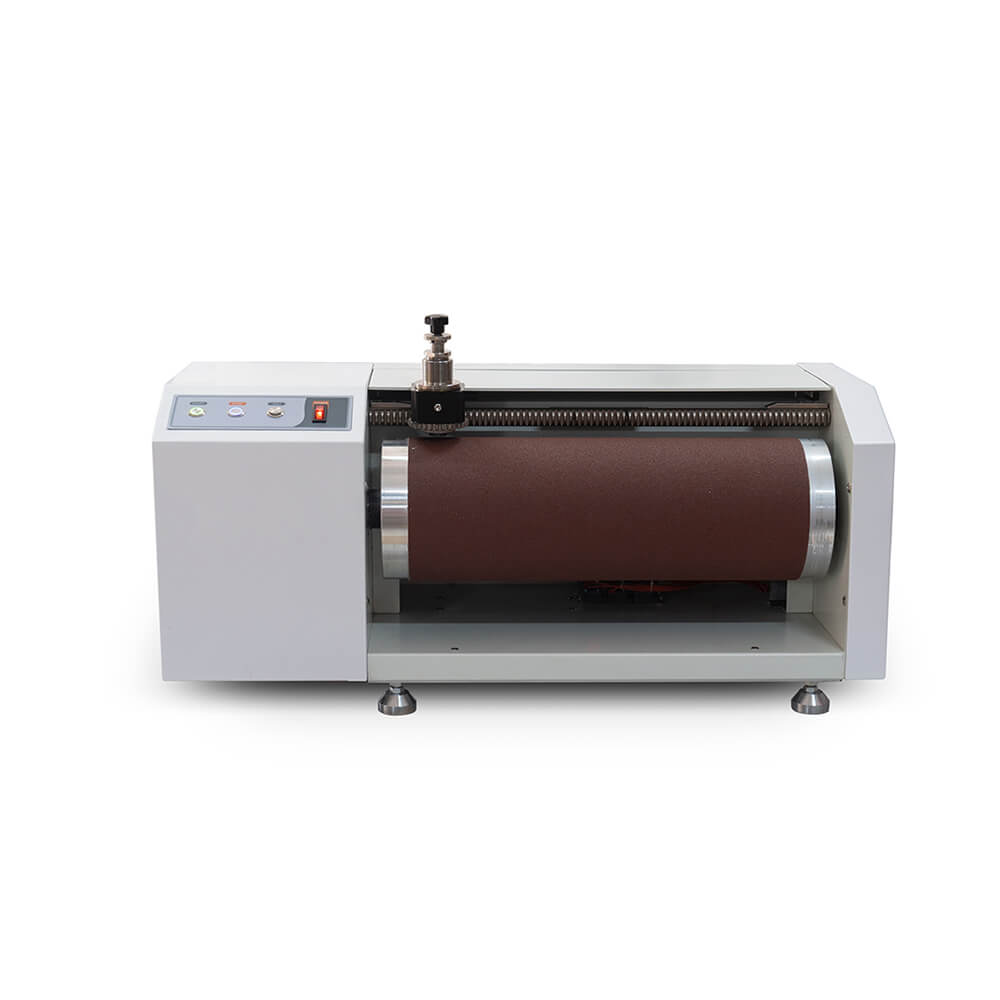
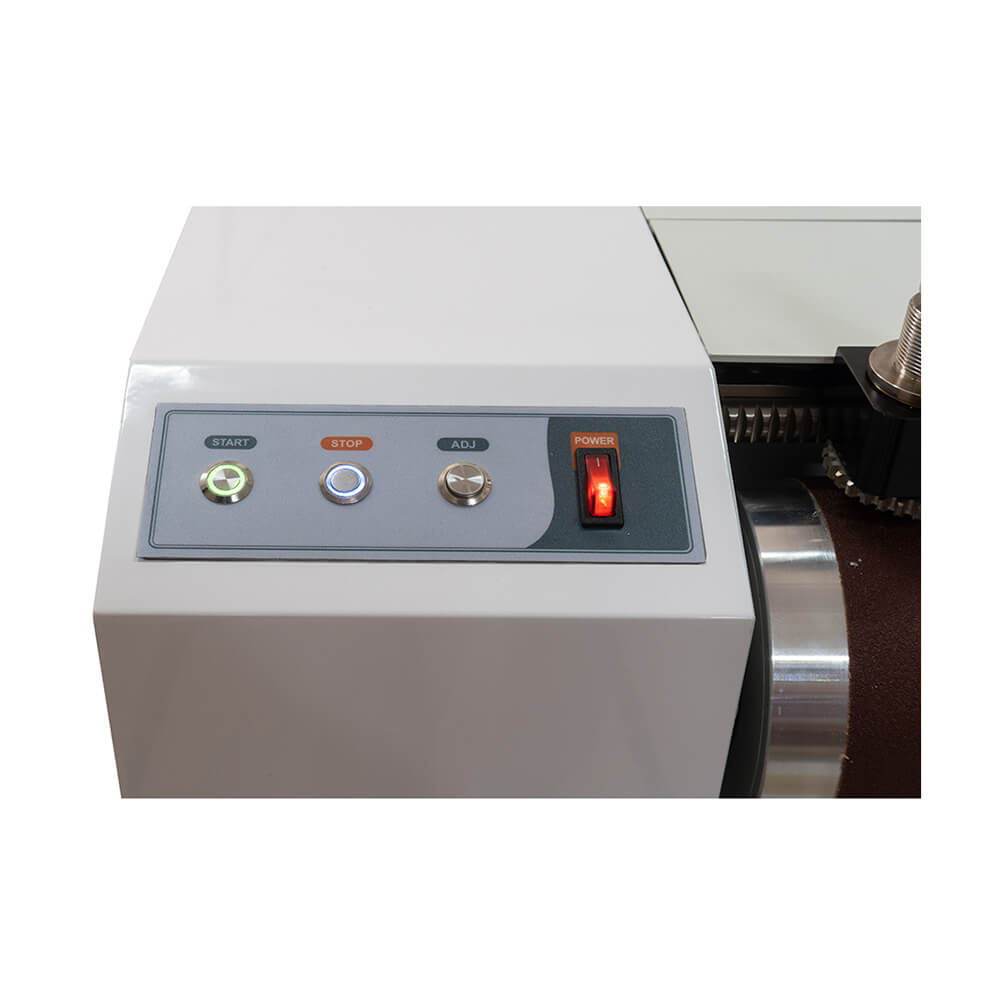
DIN Abrasion Tester is used to determine the abrasion resistance of flexible materials, such as rubber, tires, leather, and so on. Moreover, it complies with DIN 53516, ASTM D5963-04, ISO 4649, ISO 20344, and so on.
Description
Application
DIN Abrader (DIN abrasion tester) is applicable to test the abrasion resistance of various materials, such as polyester sole, shoe sole, and polymer sheet material. Moreover, it is in accordance with DIN 53516, ASTM D5963-04, ISO 4649, ISO 20344, and so on. By rubbing the sample with a rotating wheel and sandpaper, at last stop the test when the surface of the fabric shows wear that meets the standard requirements.
According to the test result, you can figure out the fabric’s wear performance by comparing it with the standard sample. The DIN Abrasion Tester TF215 provides a wide testing area to meet most requests with additional and required balance. If you are looking for a specially customized DIN Abrasion Tester, it can be your best choice as it is characterized by its top quality and safe operation.
Specifications
- Load Weight: 5N,10N
- Roll Dim: Diameter 150mm, Length 460mm
- Rotation Speed: 40rpm
- Moving Distance of the Holder: 4.2mm each rotation
Standard Accessories
- Gauge
- Pre-grinding block
- Sampling plate
- Brush
- Weights: 2.5N, 5N
Optional Accessories
- Weights
- Sandpaper: No.60
- Standard reference glue No.1
- Standard reference glue No.2
Weight
| 61 kg |
Power
| 220/110 V | 50/60 Hz | 3 A |
Dimensions
| Length: 750 mm | Width: 300 mm | Height: 420 mm |
Standards
| ISO 20344 - 8.4 | ASTM D5963 | GB/T 9867 | SATRA TM174 |
| Optional Standards | ISO 4649 |
ISO 4649: Rubber, vulcanized, or thermoplastic — Determination of abrasion resistance using a rotating cylindrical drum device
ISO 4649:2017 specifies two methods for the determination of the abrasion resistance of rubber. Method ISO 4649, in general, involves rubbing the specimen on a specified grade of abrasive. Then evaluate the abrasion degree of the specimen by the change in the specimen.
Method A is for a non-rotating test piece and concurrently method B is for a rotating test piece. For each method, report the test result as a relative volume loss or an abrasion resistance index. These test methods are suitable for comparative testing, quality control, specification compliance testing, referee purposes and research and development work. Emphatically, no close relation between the results of this abrasion test and service performance can be inferred.
NOTE The abrasion loss is often more uniform using the rotating test piece because the whole surface of the test piece is in contact with the abrasive sheet over the duration of the test. However, there is considerable experience using the non-rotating test piece.
Welcome to TESTEX – a professional textile testing instrument supplier – DIN Abrasion Tester TF215 is on sale, contact us to get a detailed price quote.
10 reviews for DIN Abrasion Tester TF215
You must be logged in to post a review.
The definition, importance, and application
DIN abrasion tester is applicable to test the abrasion resistance of various materials, such as polyester sole, shoe sole, and polymer sheet material. The abrasion resistance of the outsole is a crucial part of the development of the durability of the finished shoe, which is also an important technical index to measure the quality level and durability of shoe products. As there is a huge market for these materials, we need to attach great importance to the test of their abrasion performance.
The test principle and features
When the worn wheel rotates, the sample is rubbed with a certain degree of sandpaper. The sample can not stop being rubbed until there is an abrasion occurring on the surface of the fabric which meets the requirements and standards. According to the test result, you can figure out the fabric’s wear performance by comparing it with the standard sample. Abrasion will come to the stage when materials and other objects rub against each other or are impacted by various hard particles such as grit. The DIN Abrasion Tester is characterized by excellent performance and reproducibility and easy operation, which can lower the cost of time, providing a wide range of testing.
DIN Abrasion Test Method
Reference method:
DIN-53516, GB-9867
Test objectives:
To determine the abrasion resistance of rubber, PTR, and plastics.
Test materials:
materials of sole, such as rubber, PTC, and plastics.
Test apparatus:
1)DIN Abrasion Test
Moving distance of the Holder: 4.2±0.04mm each rotation
Roll Dimension: Diameter 150mm x Length 460mm
Rotation speed: 40±1rpm
The Speed of Clamp holder: while the rotary drum spins 50rpm, the clamp holder spins 1rpm.
Angle: 3°(the angle between test piece support and vertical plane of roller)
2)Tubular drill (diameter: 16±0.2mm)
3)Small electric drill with a vertically adjustable drill bit
4)Standard rubber test piece (complies with DIN53516 standards)
5)Universal glue (can be used to adhere with a test piece of rubber and plastics)
6)60 Sandpaper (conforms toDIN53516 standards)
7)Electronic balance (corrects to 0.0001g)
8)Soft brush
9)Shore hardness tester (SHORE A)
Preparation for test pieces:
Three test pieces are cut from different positions of the material with a diameter of 16±0.2mm and a thickness of 6.0~10mm by the tubular drill. The test piece is parallel to the top and bottom, and the round flank must be vertical to both sides, which is in the shape of the column. (Attention: If the thickness of the test piece is less than 6.0mm, other test pieces of rubber with a hardness of 65HA should be taken in the same way, and adhered to by the universal glue to ensure the thickness up to at least 6mm. )
The number of test pieces: at least 3 pieces of each material
Instrumental correction: After repeating tests 10 times, it should be corrected by a standard rubber in the following way. Firstly, a standard rubber should be tested 3 times, and indicate its mean as S. The test is carried out in a correct way without any error if the mean of standard rubber wear reaches about 200±20mg. If the mean of standard rubber wear is over 220mg, it shows that the sandpaper is so sharp that needs to be readjusted. Then, put the iron of the same size in the test piece, and the standard rubber should not stop being rubbed until it is less than 220mg. If it wears less than 180mg, the sandpaper needs to be changed because it is too blunt. (Note: If the wear of the test piece is more than 15mg, the test piece should be abandoned and retested.)
Test procedure:
1)According to the method of measuring the proportion of materials, we determine the proportion of materials which is indicated as Q.
2)Add 250g and 500g weight to the upper end of the fixed column, we must make sure that the total weight of the fixed column is 1kg (the specimen clamp itself weighs 250g).
3)The specimen should be cleaned with soft bristles, in order to keep any dirt away. As a result, there is a need for you to wipe the burrs with your fingers.
4)When using electronic scales to weigh the specimen, the error value should be controlled at 0.001g accurately, which is denoted as W1.
5)Clean the dirt left by the previous two tests with the soft bristles.
6)Fix the test piece and at the same time ensure that the surface of the specimen should be parallel to the bottom of the stationary column. And then turn the knob anticlockwise for two revolutions, which results in the surface of the specimen being higher than the column head by 2.0±0.2mm. During the testing process, if the test piece is expected to wear poorly, the machine will stop halfway when the length of wear may exceed 2mm, and we should pull out the specimen 2mm so as to continue the test.
7)Lower the column head and place it on the starting point of the drum wheel, and then start the machine and vacuum cleaner. Let the specimen be worn on the drum wheel from the starting point to the terminal point, in which the whole distance is 40m.
8)Remove the specimen from the column head, wipe the adhesive fragment with our fingers and remove dirt and debris with a soft brush.
9)Weigh the specimen again and the numerical value should be accurate to 0.001g, which is indicated as W2.
Note:
1)Check whether the expiration date of the standard adhesive is within 1 year before testing.
2)Need to make a mark on the specimen when weighting it after pre-grinding. That is to say, the specimen is required to be installed back in the original position because the test surface of the specimen is not flat. The change of the position can result in the variation of the contact area between the sandpaper and the specimen.
3)At the end of the test, the whole specimen should not be worn off by sandpaper. The test method is to observe whether the surface of the specimen and the end of the specimen holder are placed horizontally. If it is level, it shows that the specimen may have been completely worn off in less than the required stroke. If so, based on the abrasion performance of the specimen, we need to re-test by shortening the friction distance or reducing the load or both of them.
4)When the abrasive dust can not be removed by the brush alone due to the very large abrasion on the surface of the specimen, the abrasive dust should be removed by a vacuum cleaner after testing each of the specimens, so as not to affect the data between parallel samples.
Computational formula:
(W1-W2)*S0
A=Q*S
In the equation:
A: Wear volume of rubber, mm3
W1: the weight before being worn by rubber test piece, mg
W2: the weight after being worn by rubber test piece, mg
Q: Density of rubber test piece, mg/mm3
S: Wear of standard rubber test piece, mg
S0: 200mg
Test result:
When calculating and indicating the mean of three test results, it should be corrected to millimeters. Keep in mind that the three test results are not the final data, but the average of them.
If you want to download the standard pdf for free, please contact us with a comment, we will respond to you as soon as possible.
A: It is normal that a loss between 180mg and 220mg is in mass in each abrasion. If the loss is less than 180mg, the sand paper should be replaced. If the loss is over 220mg, metal sheet should be used to polish the sand paper.
Q: What is the power of the motor for this instrument?
A: The power is 120 W AC. If you need, we can adjust the voltage of this instrument to the same as your industrial voltage.


George Paul –
This one is very stable to determine abrasion of flexible materials
Jacob J –
I searched this din abrasion tester from google, and glad i find testex, good service, working great by far
Carrie –
please qutoe me EXW price of the DIN abrasion tester, My customer from India is looking for this .
testextextile –
Hi Carrie, Our sales is following up your case, thank you.
Ethel Cook –
Goods received. I will update my review, but for now it’s wonderful!
Ina Jerome –
So glad that I purchased this DIN Abrasion Tester. It’s easy to use and easy to set up!
Una Jessie –
DIN abrasion tester to test my tires is very excellent.
Dale Sailsbury –
Pretty good,the machine fit as description.
Venus Lucius –
The rotary drum abrasion tester is very good.
Harry –
very quick delivery and all as promissed
Rex –
Arrived fast. Good and involved seller. Product is perfect.